Adobe Premiere Pro Beginners Guide
I was exploring iMovie which was good, but ultimately my apple hardware was too old and frustrating to simple editing on ie chop up clips quickly, which is a super important part of getting good at making movies.
So lets move fast and onto Premiere Pro on new PC hardware.
Install Proces and Cost
There is a 7 day free trial of Adobe Premiere Pro. £19.97/mo (annual but paid montly), £30.34/mo cancel anytime. If you cancel the free triel they will have you a special plan as an offer.. £20?
Adobe Genuine Service (AGS) - didn’t need to install
Creative Cloud Desktop, which installs Premiere Pro.
took about 15mins. Tutorial didn’t start and seemed to hang (worked after a restart of the program). I couldn’t figure out the next button, so went straight to youtube for guidance on how to use it.
Nomenclature
- Project Panel - import and organise media
- Source Monitor - review footage
- Timeline - arrange clips into a sequence
- Program monitor - preview
Create New Project
c:\premiere is where I keep my projects
Create Bins
- Broll - video shots
- pictures
- Audio
GoPro footage
c:\gopro\camping
- THM file - thumbnail
- LRV file - low resolution video
I like to have correct dates modified when copying to filesystem from my gopro sd card. Sometimes when I drag it doesn’t work, so need to do this:
robocopy H:\DCIM\100GOPRO c:\gopro /COPY:DT /DCOPY:T
But ultimately I used the sequential filenames to get datetime order of footage.
Create new Sequence
Basically I put anything in here, and let Premiere adjust the sequence to my gopro footage when I add a clip.
Be careful to add in a 5312 * 2988 at 29.97 fps clip first (otherwise you’ll have to select all clips, then clip menu, video, scale to frame size)
My GoPro 11 Black is shooting at:
- 5312 * 2988 (5.3k) at 29.97fps and 59.94fps - 16:9 aspect ratio
- 2704 * 1520 - slomo eg 239.76 fps- 16:9 aspect ratio
Go Pro 11 Black video settings and resolutions - it can shoot in many different resolutions and indeed create your own.
*to get it to shoot at 30fps, set the anti flicker to 60Hz (USA). I’m in the UK so have set it to 50Hz which gives me the stadard 25fps for PAL.
common resolutions eg youtube are:
- 2160p - 3840 * 2160 (16:9 aka widescreen) which is 4K Ultra HD (UHD) (matts off road - 30fps). Sides chopped on smartphone.
- xxx - 3840 x 1920 (18:9 or 2.00) 4K UHD (ltt shoots in this - 30fps). Better for modern smartphone.
- 1440p - 2560 * 1440 (16:9)
- 1080p - 1920 * 1080 (16:9)
- 720p - 1280 * 720
- 480p - 854 * 480
4:3 is fullscreen mode (old school tv)
8:7 is a new aspect ratio on gopro which uses all the sensor to allow cropping to other ratios. This gives the flexibility to shoot in this, then crop later for: instagram reels / tictok etc.. but makes video file lager.
YT recommends to upload at the same fps as the camera shooting it - common framerates are 24, 25, 30, 48, 50, 60
Different Framerates
https://www.youtube.com/watch?v=dR7B8uKc0JU&t=135s Brendon Li video
- 200fps, 2704 * 1520
- 25fps, 5312 * 2988
frame rate = number of pictures per second
shutter speed = amount of time that the shutter stays open during each frames exposure
So, always keep shutter speed faster than the frame rate
- 24 fps (technically 23.97) - movies
- 25 fps - PAL braodcast (Europe and Asia) - power frequency is 50 Hz - 625 scan lines
- 30 fps - NTSC (North and South America) - power frequency is 60 Hz - 525 scan lines
- 48-60fps - HFR (Hobbit Frame Rate)
Creative Frame Rates
Maths problem - if you can’t evenly divide the frames being recorded by project framerate, you don’t get an even number. So you’ll get stutter.
Shutter speed will be higher at higher fps, so you’ll get less natural motion blur
Base frame rate is where your camera will probably do highest quality image eg 24, 25 or 30 fps
ROT
Choose frame rate based on subject
- 24 or 25 - any subject that is speaking and will be at real speed. Landscapes, little motion. I used 25fps. as UK PAL
- 30 - can use this as an 80% speed (with base at 24)… smooth walking slightly slower
- 60 - medium speed slo mo. people laughing, people clapping, walking. singing (if you don’t want audio in post)
- 90-120 - speed ramp down to slowmo.. dramatic.. also elimintas camera shake for small sections
- 180+
For slow, mostly still videos go for 25-30fps eg https://www.youtube.com/watch?v=sl0UUhmaiDU - he is shooting at 30fps in 4k.. well 3840 x 1920.. which is more cinematic aspect ratio. ie black on top and bottom. Totally gorgeous footage and filming!
https://www.youtube.com/watch?v=JhVJMO0wgTE filming in 3840 x 2160 at 24fps
Gaming highlights/montages which need more fps
https://www.youtube.com/watch?v=JXDoCJnaD20 1920 x 1080 at 60 fps - but the video quality isn’t great.
So, for family style videos
- base rate of 30fps/25fps
My computer monitors are:
- 3840 x 2160 (4K) at 60Hz
- 1920 x 1080 (1080p) at 60Hz
ltt 3840 x 1920 (cinematic) at 30fps
My Go Pro settings
settings - swipe down
- voice off
- beeps off
- quick capture on
- screen orientation lock on
–
- video mode - highest
- controls - pro
– preferences - gps off (to conserve battery) —
video presets
Here are the standard ones
- Standard
- FullFrame
- Activity
- Cinematic
- Ultra Slo-Mo
My Preset settings
Gemini Connect taken from this great video: See right at the end for her presets.
- 16:9 ratio (aka widescreen)
- 25fps at 4k for standard shooting - not 5.3k as don’t need it.. have nothing to view on!
- lens or FOV (Field of View) ie 19 - 39mm (least wide angle with horizon lock)
- hypersmooth (image stabilisation) with minimal
protune
- 10bit (more colour range) - on. takes up more space
- bitrate high
- shutter speed - auto
-
iso min and max - auto
- sharpness medium
- colour - vibrant (do this) or natural. flat always needs post processing.
audio
can get a media mod case, which has a 3.5mm input and mic. But best possible audio
Gemini Connect - big review.
4. Workspace
Different preset layouts depending on what tasks you’re doing
- Editing (main one)
- Effects (for transitions)
- Captions and Graphics (titles)
4.5 Previewing imgaes from GoPro / iPhone
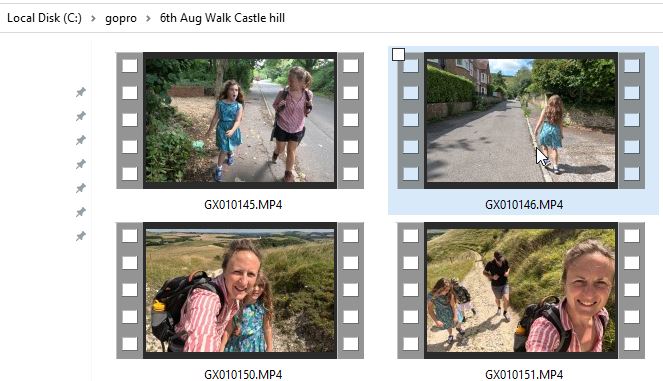
https://www.howtogeek.com/680690/how-to-install-free-hevc-codecs-on-windows-10-for-h265-video/ I paid £0.79 for a codec which allowed me to preview footage in windows explorer which is very useful!
Right Click an MP4 file, Properties, Open With, Media Player.
5. Importing
- drag it onto timeline
- double click and view in source monitor, use in and out points to grab sections
I like the second option using
- i - in point
- o - out point
To get roughly the bits I want
6. Editing keyboard
check snap is on (magnet icon in timeline)
use shorten clip rather than cut (razor)
- mouse wheen - left and right
-
alt mouse wheel - zoom
- up down arrow - next section
-
j and l - fast forward
-
- and + - zoom in
- Ctrl + - zoom in
-
Alt and mouse wheen to zoom in an dout
- Ctrl + Shift + Y - redo
Tools
v - selection tool c - razor tool n - rolling edit (to get cut point to suit actions better) y - slip tool (change in and out points without changing time) z - zoom (or alt click to zoom out)
shift delete - delete get rid of space (ripple delete)
- ctrl and drag - add into timeline and move other things around it.
- , - add to start of timeline (from source monitor)
Speed up and slow down clips
right click, speed duration
Can also reverse the clip
9. Transitions
Effects tab in bottom left window or use the Workspace / effets
Video Transitions / cross dissolve is nice
zoom in to make shoter by dragging
cross dissolve from black at the beginning
constant power audio fade in at beginning
video effects
gaussian blur - to highlight the people for example using a mask
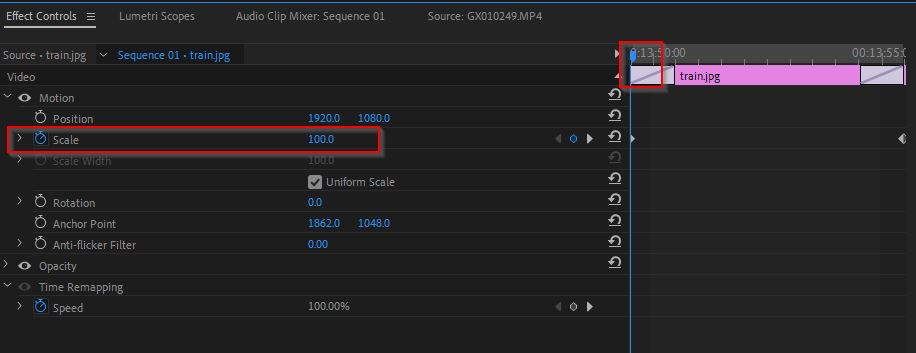
digital zoom - effect control / motion / scale click stopwatch icon at start of clip, then move playhead to end, and do 130% scale youtube
captions and graphics
Workspace / Captions and Graphics
- T - Type tool
highlight the text to make changes to it
audio
drag it on! adjust levels
- parametric EQ to enhance vocals
- compressor on vox
then eq on music to take down 1khz vocal range also compressor on music
sequence layer for colouring
create new sequence layer
LUT - look up tables
SL IRON LDR is cool
- shift e - enable / disable layer
exporting
- i - set in point at beginning
- o - set out point at end
To clear, right click to clear in and out points
click to export.
upload to youtube and this is my test video
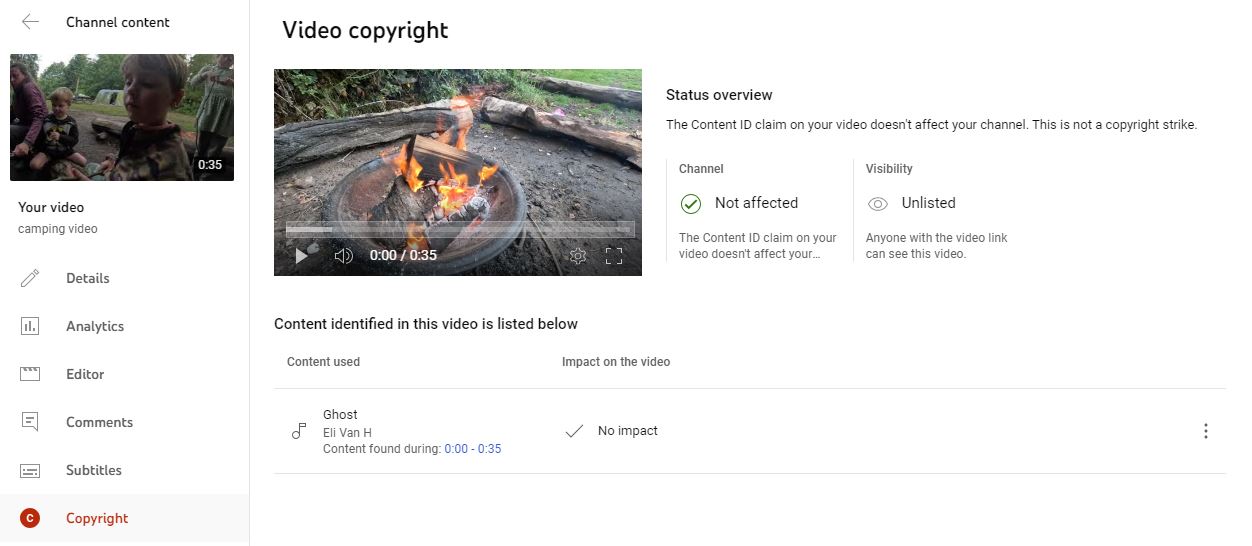
Interestingly our track from our band got caught in the copyright filter!
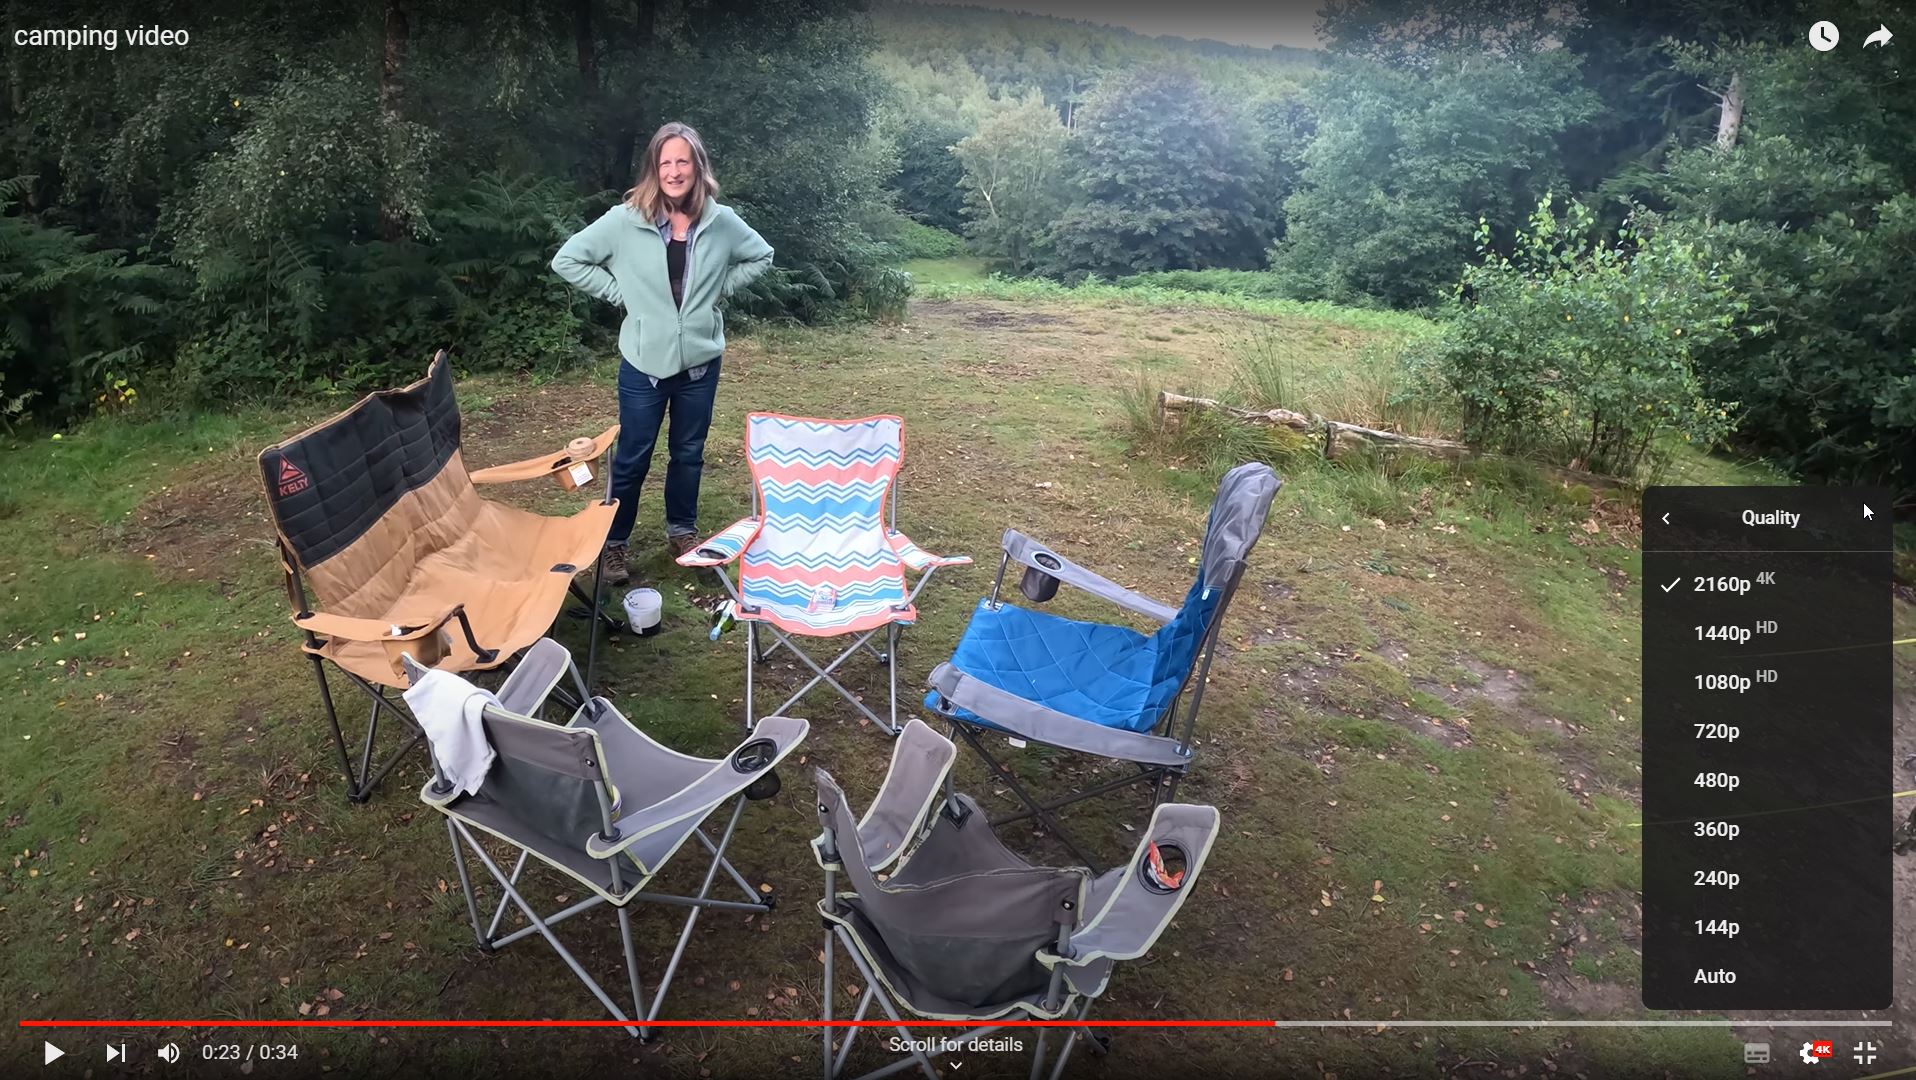
Aspect ratio is fine at 16:9 (same aspect ratio at 1920*1080), 4k quality ie 3840x2160 ie 2160p. The original footage is mostly on 5312 * 2988 (5.3k)
Photos
scale to frame size - useful to scale properly (set also is another option)
then manually scale to maybe 120 in Effects
- copy
- ctrl A
- right click and paste attributes to paste this scaling onto all
cross dissolve
- select all photos
- sequence, apply video transition. or ctrl D
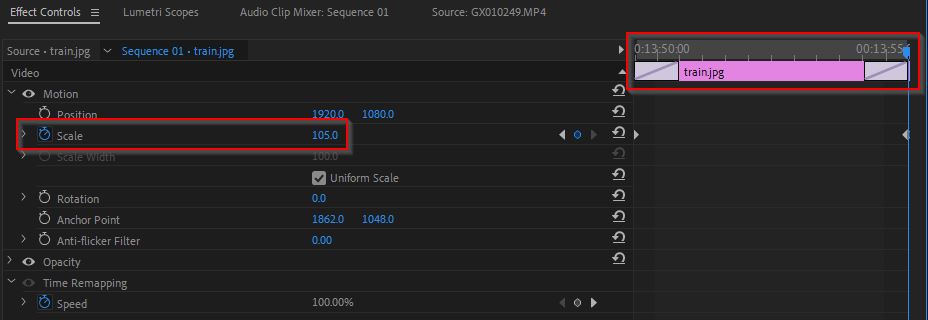
ken burns effect
- set timeline to start of photo clip
- click on scale stopwatch
- make sure at 100 or whatever you like eg 120?
then drag to end of photo clip
- set scale to a bit more eg 105
- copy then clip
- highlight all the others
- right click, paste attributes
Blur background
To get rid of black bars
https://www.youtube.com/watch?v=hWZ6tcCODYY see minute 7.
Export
-
Ctrl A
-
stil haven’t found an easy way!
Notes on Eastbourne airshow
- Love the section of Spy who loved me!
- Red arrows
Horizon locking so important!
Do a short
Just that section of Annie
